
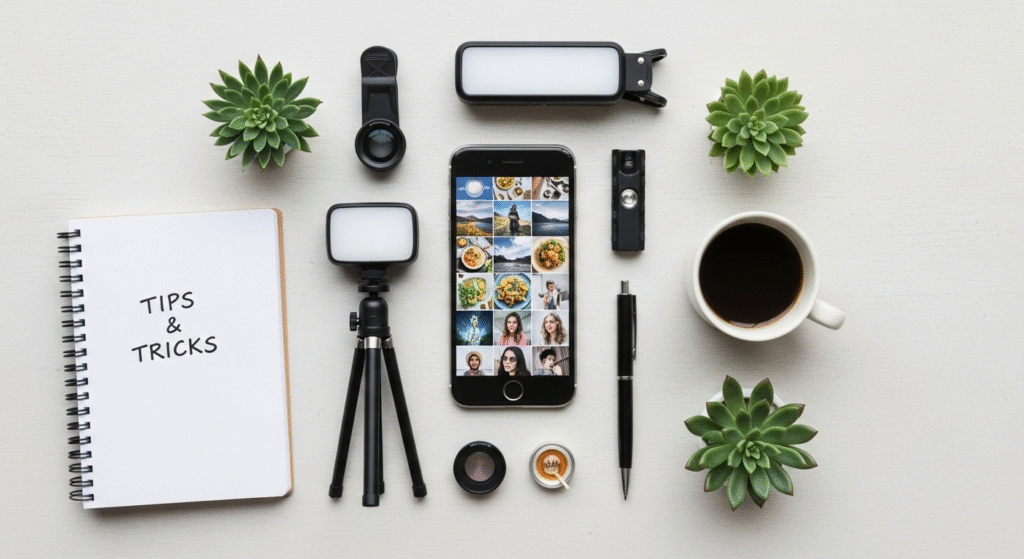
Okay, let’s be real. We’ve all been there. Scrolling through Instagram, seeing those seemingly effortless, perfectly-lit photos, and thinking, “How do they DO that?” Are they secretly professional photographers? Do they have a studio setup in their living room? The truth is, while some Insta-celebs might have fancy equipment, a huge chunk of amazing smartphone photography comes down to a few simple tricks. And the best part? You can learn them. Seriously.
I remember when I first started trying to take ‘gram-worthy photos. Ugh. Let’s just say the results were… underwhelming. Grainy, poorly composed, and generally blah. But I was determined to figure it out. Years later, after much trial, error, and a whole lot of deleted photos, I’ve learned a thing or two. And I’m here to share those hard-won secrets with you. So, grab your phone, maybe a coffee (or tea, if that’s your thing), and let’s dive in. Because trust me, your Instagram game is about to get a serious upgrade.
Mastering Natural Light (It’s Easier Than You Think!)
Okay, this is the big one. The holy grail of smartphone photography. Forget fancy lighting kits and reflectors for now. Natural light is your friend. Seriously, your BEST friend. And the beautiful thing about natural light is that its free!. But you have to know how to use it.
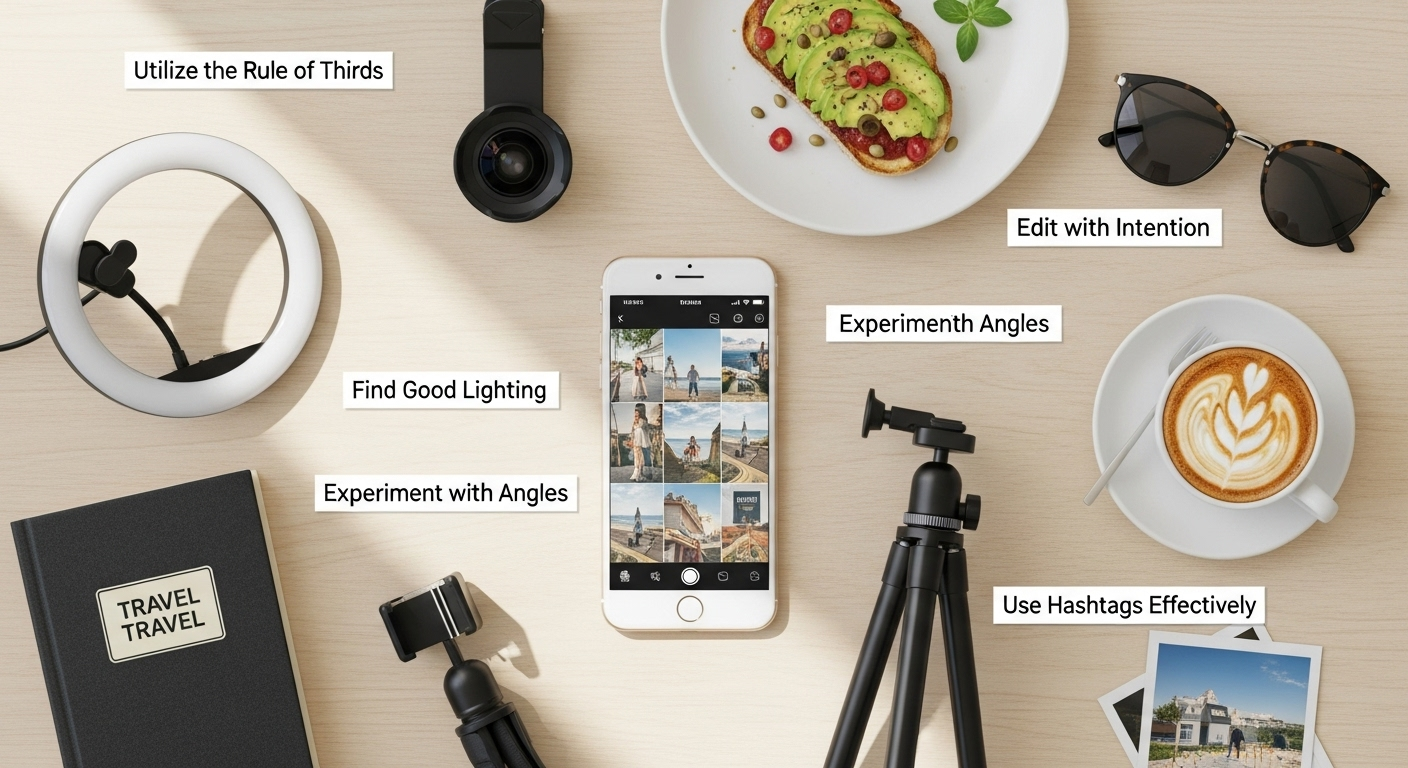
The golden hours – that’s the hour after sunrise and the hour before sunset – are, well, golden. The light is soft, warm, and flattering. It’s like a real-life filter. But what if you want to take photos during the day? No problem! Just avoid direct sunlight, which can be harsh and create unflattering shadows. Find some shade, or shoot near a window. Experiment! See how the light changes throughout the day. You’ll be amazed at the difference it makes.
One thing I’ve learned: pay attention to the direction of the light. Backlighting (when the light source is behind your subject) can create a beautiful, ethereal effect, but you need to be careful not to overexpose the background. Sidelighting (when the light is coming from the side) can add drama and dimension. Front lighting (when the light is shining directly on your subject) is generally the most flattering, but it can also be a bit boring. The key is to experiment and see what works best for you.
Composition is Key: More Than Just Point and Shoot
So, you’ve got the lighting down. Great! But a well-lit photo can still be… well, boring if the composition is off. Composition is all about arranging the elements in your photo in a way that is pleasing to the eye and tells a story. And no, it’s not some complicated art theory thing. It’s actually pretty simple. The rule of thirds is a great place to start. Imagine your photo divided into nine equal squares by two horizontal lines and two vertical lines. Place your subject at one of the intersections of these lines, or along one of the lines themselves. This creates a more balanced and interesting composition.
But don’t be afraid to break the rules! Sometimes, centering your subject can be just as effective. It all depends on what you’re trying to achieve. And consider leading lines. Lines that draw the viewer’s eye into the photo. Roads, fences, even shadows can be used as leading lines. Use them to guide the viewer to your subject, or to create a sense of depth.
And perspective! Get down low. Climb up high. Shoot from a different angle. You’d be amazed at how much a change in perspective can transform a photo. I’ve got to admit, this part fascinates me. Thinking about how our eyes are drawn to certain things, how our brains interpret visual information…it’s all so cool!
Editing: From “Meh” to “Wow”
Okay, let’s talk editing. Now, I’m not talking about turning your photos into heavily filtered, unrecognizable messes. Editing should enhance your photos, not disguise them. Think of it as the final polish, the cherry on top.
There are tons of great editing apps out there, both free and paid. Snapseed and VSCO are two popular choices. Start by adjusting the exposure, contrast, and saturation. A little goes a long way! Don’t overdo it. Then, play around with the highlights, shadows, and white balance. These adjustments can make a huge difference in the overall look and feel of your photo.
Wait, there’s something even more interesting here… presets! Many photographers (including yours truly, sometimes) create and sell presets. Presets are basically pre-made editing recipes that you can apply to your photos with one click. They can save you a ton of time and give your photos a consistent look. But be careful not to rely on them too much. Every photo is different, and what looks good on one photo might not look good on another. I initially thought presets were a shortcut, but after using them, they’re now an integral part of my workflow. Here is a gaming site that provides free editing, I think you must try it!
Think Before You Snap: The Power of Planning
This might sound obvious, but it’s worth repeating: think before you snap. Don’t just randomly point and shoot. Take a moment to consider what you’re trying to capture. What’s the story you want to tell? What are the key elements you want to include? Consider the background. Is it cluttered and distracting? Or does it complement your subject? Pay attention to details. Are there any stray hairs, wrinkles in your clothes, or other imperfections that you can easily fix? All of these small things can add up to make a big difference in the final photo.
Also, don’t be afraid to take multiple shots. Experiment with different angles, poses, and expressions. The more options you have, the better. And don’t be afraid to ask for help! If you’re struggling to get the perfect shot, ask a friend to take the photo for you. A fresh perspective can be invaluable.
And hey, check out this related article: AI and Photography. And here’s one more interesting piece on visual storytelling.
Smartphone Photography Tips: FAQ
How do I know if I’m using the right lighting?
Great question! The key is to pay attention to the shadows. If the shadows are harsh and dark, the lighting is probably too direct. If the shadows are soft and subtle, the lighting is probably just right. Experiment with different angles and positions to see how the light changes. And don’t be afraid to move your subject around. Sometimes, a small adjustment can make a big difference.
Why do my smartphone photos sometimes look blurry?
Blurriness is the bane of every smartphone photographer’s existence! The most common cause is camera shake. Make sure you’re holding your phone steady when you take a photo. You can also try using a tripod or resting your phone on a stable surface. Another cause of blurriness is low light. Smartphones struggle in low-light conditions, which can result in blurry or grainy photos. If you’re shooting in low light, try using a slow shutter speed or increasing the ISO. But be careful, because these settings can also introduce noise into your photos.
What’s the best way to take a portrait with my smartphone?
Portraits are all about capturing the personality and essence of your subject. Start by finding good lighting. Soft, natural light is always best. Avoid direct sunlight, which can create harsh shadows. Then, pay attention to the background. Make sure it’s not too cluttered or distracting. Use the rule of thirds to compose your shot. And don’t be afraid to get close to your subject. A close-up portrait can be very powerful. The frustrating thing about this topic is, there are so many factors that plays important role in taking portrait.
Is it okay to use filters on my Instagram photos?
This is a tricky one. Filters can be a fun way to add personality to your photos. But they can also be overused and abused. The key is to use them sparingly and tastefully. Avoid filters that are too harsh or unrealistic. Look for filters that enhance your photos without completely changing them. And don’t be afraid to create your own custom filters using the editing tools in Instagram or another editing app. If you’re using Smartphone Photography Tips: Level Up Your Instagram Game then its okay to use filters.